
Diffusers documentation
Kandinsky 2.1
Kandinsky 2.1
Kandinsky 2.1 は、Arseniy Shakhmatov、Anton Razzhigaev、Aleksandr Nikolich、Vladimir Arkhipkin、Igor Pavlov、Andrey Kuznetsov、Denis Dimitrov によって作成されました。
そのGitHubページの説明は以下の通りです:
Kandinsky 2.1 は、Dall-E 2 と Latent diffusion の優れたプラクティスを継承しつつ、いくつかの新しいアイデアを導入しています。テキストおよび画像エンコーダーとして CLIP モデルを使用し、CLIP のモダリティ間の潜在空間の間に拡散画像事前分布(マッピング)を適用します。このアプローチにより、モデルの視覚的なパフォーマンスが向上し、画像のブレンドやテキスト主導の画像操作において新たな可能性が広がります。
元のコードベースは ai-forever/Kandinsky-2 で確認できます。
Hub上のKandinsky Community組織では、テキストから画像への変換、画像から画像への変換、インペインティングなどのタスク向けの公式モデルチェックポイントを確認できます。
スケジューラーのトレードオフ、すなわち速度と品質のバランスをどのように探求するかを学ぶには、ガイドを必ずご確認ください。また、同じコンポーネントを複数のパイプラインに効率的に読み込む方法については、パイプライン間でコンポーネントを再利用するセクションを参照してください。
以下のライブラリがインストールされていることを確認してください。
# uncomment to install the necessary libraries in Colab
#!pip install -q diffusers transformers accelerate
Kandinsky 2.1 と 2.2 の使い方は非常に似ています! 唯一の違いは、Kandinsky 2.2 は latents をデコードする際に
promptを入力として受け付けない点です。代わりに、Kandinsky 2.2 はデコード時にimage_embedsのみを接受します。
Kandinsky 3 はより簡潔なアーキテクチャを持ち、事前モデルを必要としません。そのため、Stable Diffusion XL などの他の拡散モデルと同様に使用できます。
テキストから画像へ
Kandinsky モデルを任意のタスクに使用する場合、常にまず prior パイプラインを設定して、プロンプトをエンコードし、画像埋め込みを生成します。prior パイプラインは、ネガティブプロンプト "" に対応する negative_image_embeds も生成します。より良い結果を得るには、prior パイプラインに実際の negative_prompt を渡すことができますが、これにより prior パイプラインの有効なバッチサイズが 2 倍になります。
from diffusers import KandinskyPriorPipeline, KandinskyPipeline
import torch

prior_pipeline = KandinskyPriorPipeline.from_pretrained("kandinsky-community/kandinsky-2-1-prior", dtype=torch.float16).to("cuda")  # or "mps", "xpu", "cpu"
pipeline = KandinskyPipeline.from_pretrained("kandinsky-community/kandinsky-2-1", dtype=torch.float16).to("cuda")

prompt = "A alien cheeseburger creature eating itself, claymation, cinematic, moody lighting"
negative_prompt = "low quality, bad quality" # optional to include a negative prompt, but results are usually better
image_embeds, negative_image_embeds = prior_pipeline(prompt, negative_prompt, guidance_scale=1.0).to_tuple()次に、すべてのプロンプトと埋め込みをKandinskyPipelineに渡し、画像を生成します:
image = pipeline(prompt, image_embeds=image_embeds, negative_prompt=negative_prompt, negative_image_embeds=negative_image_embeds, height=768, width=768).images[0]
image
from diffusers import KandinskyV22PriorPipeline, KandinskyV22Pipeline
import torch

prior_pipeline = KandinskyV22PriorPipeline.from_pretrained("kandinsky-community/kandinsky-2-2-prior", dtype=torch.float16).to("cuda")  # or "mps", "xpu", "cpu"
pipeline = KandinskyV22Pipeline.from_pretrained("kandinsky-community/kandinsky-2-2-decoder", dtype=torch.float16).to("cuda")

prompt = "A alien cheeseburger creature eating itself, claymation, cinematic, moody lighting"
negative_prompt = "low quality, bad quality" # optional to include a negative prompt, but results are usually better
image_embeds, negative_image_embeds = prior_pipeline(prompt, guidance_scale=1.0).to_tuple()image_embedsとnegative_image_embedsをKandinskyV22Pipelineに渡して画像を生成します:
image = pipeline(image_embeds=image_embeds, negative_image_embeds=negative_image_embeds, height=768, width=768).images[0]
image
Kandinsky 3 は事前モデルを必要としないため、Kandinsky3Pipeline を直接ロードし、プロンプトを渡して画像を生成できます。
from diffusers import Kandinsky3Pipeline
import torch

pipeline = Kandinsky3Pipeline.from_pretrained("kandinsky-community/kandinsky-3", variant="fp16", dtype=torch.float16)
pipeline.enable_model_cpu_offload()

prompt = "A alien cheeseburger creature eating itself, claymation, cinematic, moody lighting"
image = pipeline(prompt).images[0]
image
🤗 Diffusers は KandinskyCombinedPipeline と KandinskyV22CombinedPipeline を用いたエンドツーエンドの API も提供しています。これにより、prior と text-to-image のパイプラインを個別にロードする必要はありません。統合パイプラインは、prior モデルとデコーダーの両方を自動的にロードします。必要に応じて、prior_guidance_scale および prior_num_inference_steps パラメータで prior パイプラインの異なる値を設定することもできます。
AutoPipelineForText2Image を使用すると、内部で統合されたパイプラインが自動的に呼び出されます。
from diffusers import AutoPipelineForText2Image
import torch

pipeline = AutoPipelineForText2Image.from_pretrained("kandinsky-community/kandinsky-2-1", dtype=torch.float16)
pipeline.enable_model_cpu_offload()

prompt = "A alien cheeseburger creature eating itself, claymation, cinematic, moody lighting"
negative_prompt = "low quality, bad quality"

image = pipeline(prompt=prompt, negative_prompt=negative_prompt, prior_guidance_scale=1.0, guidance_scale=4.0, height=768, width=768).images[0]
imagefrom diffusers import AutoPipelineForText2Image
import torch
pipeline = AutoPipelineForText2Image.from_pretrained("kandinsky-community/kandinsky-2-2-decoder", dtype=torch.float16)
pipeline.enable_model_cpu_offload()
prompt = "A alien cheeseburger creature eating itself, claymation, cinematic, moody lighting"
negative_prompt = "low quality, bad quality"
image = pipeline(prompt=prompt, negative_prompt=negative_prompt, prior_guidance_scale=1.0, guidance_scale=4.0, height=768, width=768).images[0]
image画像から画像へ
画像から画像への生成では、初期画像とテキストプロンプトをパイプラインに渡して、画像の条件付けを行います。まず、priorパイプラインを読み込みます:
import torch
from diffusers import KandinskyImg2ImgPipeline, KandinskyPriorPipeline

prior_pipeline = KandinskyPriorPipeline.from_pretrained("kandinsky-community/kandinsky-2-1-prior", dtype=torch.float16, use_safetensors=True).to("cuda")  # or "mps", "xpu", "cpu"
pipeline = KandinskyImg2ImgPipeline.from_pretrained("kandinsky-community/kandinsky-2-1", dtype=torch.float16, use_safetensors=True).to("cuda")import torch
from diffusers import KandinskyV22Img2ImgPipeline, KandinskyPriorPipeline
prior_pipeline = KandinskyPriorPipeline.from_pretrained("kandinsky-community/kandinsky-2-2-prior", dtype=torch.float16, use_safetensors=True).to("cuda") # or "mps", "xpu", "cpu"
pipeline = KandinskyV22Img2ImgPipeline.from_pretrained("kandinsky-community/kandinsky-2-2-decoder", dtype=torch.float16, use_safetensors=True).to("cuda")Kandinsky 3 は事前モデルを必要としないため、image-to-image パイプラインを直接ロードできます:
from diffusers import Kandinsky3Img2ImgPipeline
from diffusers.utils import load_image
import torch

pipeline = Kandinsky3Img2ImgPipeline.from_pretrained("kandinsky-community/kandinsky-3", variant="fp16", dtype=torch.float16)
pipeline.enable_model_cpu_offload()
条件付けに使用する画像をダウンロードします:
from diffusers.utils import load_image

# download image
url = "https://raw.githubusercontent.com/CompVis/stable-diffusion/main/assets/stable-samples/img2img/sketch-mountains-input.jpg"
original_image = load_image(url)
original_image = original_image.resize((768, 512))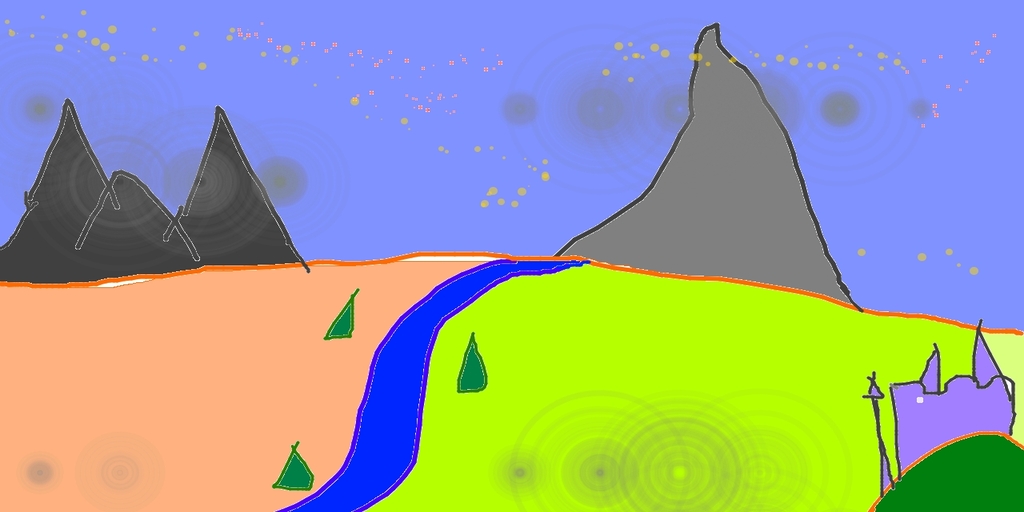
以前のパイプラインでimage_embedsとnegative_image_embedsを生成します:
prompt = "A fantasy landscape, Cinematic lighting"
negative_prompt = "low quality, bad quality"

image_embeds, negative_image_embeds = prior_pipeline(prompt, negative_prompt).to_tuple()
次に、元の画像、すべてのプロンプトと埋め込みをパイプラインに渡し、画像を生成します:
from diffusers.utils import make_image_grid

image = pipeline(prompt, negative_prompt=negative_prompt, image=original_image, image_embeds=image_embeds, negative_image_embeds=negative_image_embeds, height=768, width=768, strength=0.3).images[0]
make_image_grid([original_image.resize((512, 512)), image.resize((512, 512))], rows=1, cols=2)
from diffusers.utils import make_image_grid

image = pipeline(image=original_image, image_embeds=image_embeds, negative_image_embeds=negative_image_embeds, height=768, width=768, strength=0.3).images[0]
make_image_grid([original_image.resize((512, 512)), image.resize((512, 512))], rows=1, cols=2)
image = pipeline(prompt, negative_prompt=negative_prompt, image=image, strength=0.75, num_inference_steps=25).images[0]
image
🤗 Diffusers は、KandinskyImg2ImgCombinedPipeline および KandinskyV22Img2ImgCombinedPipeline によるエンドツーエンドの API も提供しています。これにより、prior と image-to-image パイプラインを個別にロードする必要はありません。統合パイプラインは、prior モデルとデコーダーの両方を自動的にロードします。必要に応じて、prior_guidance_scale および prior_num_inference_steps パラメータを使用して、prior パイプラインに異なる値を設定することもできます。
AutoPipelineForImage2Image を使用すると、内部で統合されたパイプラインが自動的に呼び出されます:
from diffusers import AutoPipelineForImage2Image
from diffusers.utils import make_image_grid, load_image
import torch

pipeline = AutoPipelineForImage2Image.from_pretrained("kandinsky-community/kandinsky-2-1", dtype=torch.float16, use_safetensors=True)
pipeline.enable_model_cpu_offload()

prompt = "A fantasy landscape, Cinematic lighting"
negative_prompt = "low quality, bad quality"

url = "https://raw.githubusercontent.com/CompVis/stable-diffusion/main/assets/stable-samples/img2img/sketch-mountains-input.jpg"
original_image = load_image(url)

original_image.thumbnail((768, 768))

image = pipeline(prompt=prompt, negative_prompt=negative_prompt, image=original_image, strength=0.3).images[0]
make_image_grid([original_image.resize((512, 512)), image.resize((512, 512))], rows=1, cols=2)from diffusers import AutoPipelineForImage2Image
from diffusers.utils import make_image_grid, load_image
import torch
pipeline = AutoPipelineForImage2Image.from_pretrained("kandinsky-community/kandinsky-2-2-decoder", dtype=torch.float16)
pipeline.enable_model_cpu_offload()
prompt = "A fantasy landscape, Cinematic lighting"
negative_prompt = "low quality, bad quality"
url = "https://raw.githubusercontent.com/CompVis/stable-diffusion/main/assets/stable-samples/img2img/sketch-mountains-input.jpg"
original_image = load_image(url)
original_image.thumbnail((768, 768))
image = pipeline(prompt=prompt, negative_prompt=negative_prompt, image=original_image, strength=0.3).images[0]
make_image_grid([original_image.resize((512, 512)), image.resize((512, 512))], rows=1, cols=2)インペインティング
⚠️ Kandinsky モデルでは、マスク領域を黒ピクセルではなく ⬜️ 白ピクセル で表すようになりました。KandinskyInpaintPipeline を本番環境で使用している場合は、マスクを白ピクセルを使用するように変更する必要があります。
# For PIL input
import PIL.ImageOps
mask = PIL.ImageOps.invert(mask)

# For PyTorch and NumPy input
mask = 1 - mask
インペインティングには、元の画像、元の画像内で置き換える領域のマスク、そしてインペインティングする内容を示すテキストプロンプトが必要です。以前のパイプラインを読み込みます:
from diffusers import KandinskyInpaintPipeline, KandinskyPriorPipeline
from diffusers.utils import load_image, make_image_grid
import torch
import numpy as np
from PIL import Image

prior_pipeline = KandinskyPriorPipeline.from_pretrained("kandinsky-community/kandinsky-2-1-prior", dtype=torch.float16, use_safetensors=True).to("cuda")  # or "mps", "xpu", "cpu"
pipeline = KandinskyInpaintPipeline.from_pretrained("kandinsky-community/kandinsky-2-1-inpaint", dtype=torch.float16, use_safetensors=True).to("cuda")from diffusers import KandinskyV22InpaintPipeline, KandinskyV22PriorPipeline
from diffusers.utils import load_image, make_image_grid
import torch
import numpy as np
from PIL import Image
prior_pipeline = KandinskyV22PriorPipeline.from_pretrained("kandinsky-community/kandinsky-2-2-prior", dtype=torch.float16, use_safetensors=True).to("cuda") # or "mps", "xpu", "cpu"
pipeline = KandinskyV22InpaintPipeline.from_pretrained("kandinsky-community/kandinsky-2-2-decoder-inpaint", dtype=torch.float16, use_safetensors=True).to("cuda")初期画像を読み込み、マスクを作成します:
init_image = load_image("https://huggingface.co/datasets/hf-internal-testing/diffusers-images/resolve/main/kandinsky/cat.png")
mask = np.zeros((768, 768), dtype=np.float32)
# mask area above cat's head
mask[:250, 250:-250] = 1
既存のパイプラインで埋め込みを生成します:
prompt = "a hat"
prior_output = prior_pipeline(prompt)
次に、初期画像、マスク、プロンプトおよび埋め込みをパイプラインに渡し、画像を生成します:
output_image = pipeline(prompt, image=init_image, mask_image=mask, **prior_output, height=768, width=768, num_inference_steps=150).images[0]
mask = Image.fromarray((mask*255).astype('uint8'), 'L')
make_image_grid([init_image, mask, output_image], rows=1, cols=3)
output_image = pipeline(image=init_image, mask_image=mask, **prior_output, height=768, width=768, num_inference_steps=150).images[0]
mask = Image.fromarray((mask*255).astype('uint8'), 'L')
make_image_grid([init_image, mask, output_image], rows=1, cols=3)
エンドツーエンドのKandinskyInpaintCombinedPipelineとKandinskyV22InpaintCombinedPipelineを使用すると、内部でpriorパイプラインとdecoderパイプラインをまとめて呼び出すことができます。これにはAutoPipelineForInpaintingを使用します:
import torch
import numpy as np
from PIL import Image
from diffusers import AutoPipelineForInpainting
from diffusers.utils import load_image, make_image_grid

pipe = AutoPipelineForInpainting.from_pretrained("kandinsky-community/kandinsky-2-1-inpaint", dtype=torch.float16)
pipe.enable_model_cpu_offload()

init_image = load_image("https://huggingface.co/datasets/hf-internal-testing/diffusers-images/resolve/main/kandinsky/cat.png")
mask = np.zeros((768, 768), dtype=np.float32)
# mask area above cat's head
mask[:250, 250:-250] = 1
prompt = "a hat"

output_image = pipe(prompt=prompt, image=init_image, mask_image=mask).images[0]
mask = Image.fromarray((mask*255).astype('uint8'), 'L')
make_image_grid([init_image, mask, output_image], rows=1, cols=3)import torch
import numpy as np
from PIL import Image
from diffusers import AutoPipelineForInpainting
from diffusers.utils import load_image, make_image_grid
pipe = AutoPipelineForInpainting.from_pretrained("kandinsky-community/kandinsky-2-2-decoder-inpaint", dtype=torch.float16)
pipe.enable_model_cpu_offload()
init_image = load_image("https://huggingface.co/datasets/hf-internal-testing/diffusers-images/resolve/main/kandinsky/cat.png")
mask = np.zeros((768, 768), dtype=np.float32)
# mask area above cat's head
mask[:250, 250:-250] = 1
prompt = "a hat"
output_image = pipe(prompt=prompt, image=original_image, mask_image=mask).images[0]
mask = Image.fromarray((mask*255).astype('uint8'), 'L')
make_image_grid([init_image, mask, output_image], rows=1, cols=3)補間
Interpolationは、画像とテキストの埋め込みの間の潜在空間を探索することを可能にし、事前モデルの中間出力の一部を確認するクールな方法です。事前パイプラインと、補間したい2つの画像を読み込みます:
from diffusers import KandinskyPriorPipeline, KandinskyPipeline
from diffusers.utils import load_image, make_image_grid
import torch

prior_pipeline = KandinskyPriorPipeline.from_pretrained("kandinsky-community/kandinsky-2-1-prior", dtype=torch.float16, use_safetensors=True).to("cuda")  # or "mps", "xpu", "cpu"
img_1 = load_image("https://huggingface.co/datasets/hf-internal-testing/diffusers-images/resolve/main/kandinsky/cat.png")
img_2 = load_image("https://huggingface.co/datasets/hf-internal-testing/diffusers-images/resolve/main/kandinsky/starry_night.jpeg")
make_image_grid([img_1.resize((512,512)), img_2.resize((512,512))], rows=1, cols=2)from diffusers import KandinskyV22PriorPipeline, KandinskyV22Pipeline
from diffusers.utils import load_image, make_image_grid
import torch
prior_pipeline = KandinskyV22PriorPipeline.from_pretrained("kandinsky-community/kandinsky-2-2-prior", dtype=torch.float16, use_safetensors=True).to("cuda") # or "mps", "xpu", "cpu"
img_1 = load_image("https://huggingface.co/datasets/hf-internal-testing/diffusers-images/resolve/main/kandinsky/cat.png")
img_2 = load_image("https://huggingface.co/datasets/hf-internal-testing/diffusers-images/resolve/main/kandinsky/starry_night.jpeg")
make_image_grid([img_1.resize((512,512)), img_2.resize((512,512))], rows=1, cols=2)

補間するテキストや画像を指定し、各テキストや画像の重みを設定します。重みを調整して、補間への影響を確認してみてください!
images_texts = ["a cat", img_1, img_2]
weights = [0.3, 0.3, 0.4]interpolate関数を呼び出して埋め込みを生成し、それをパイプラインに渡して画像を生成します。
# prompt can be left empty
prompt = ""
prior_out = prior_pipeline.interpolate(images_texts, weights)

pipeline = KandinskyPipeline.from_pretrained("kandinsky-community/kandinsky-2-1", dtype=torch.float16, use_safetensors=True).to("cuda")  # or "mps", "xpu", "cpu"

image = pipeline(prompt, **prior_out, height=768, width=768).images[0]
image
# prompt can be left empty
prompt = ""
prior_out = prior_pipeline.interpolate(images_texts, weights)

pipeline = KandinskyV22Pipeline.from_pretrained("kandinsky-community/kandinsky-2-2-decoder", dtype=torch.float16, use_safetensors=True).to("cuda")  # or "mps", "xpu", "cpu"

image = pipeline(prompt, **prior_out, height=768, width=768).images[0]
image
ControlNet
⚠️ ControlNetはKandinsky 2.2でのみサポートされています!
ControlNetは、深度マップやエッジ検出などの追加入力を用いて、大規模な事前学習済み拡散モデルを条件付けすることを可能にします。例えば、Kandinsky 2.2を深度マップで条件付けると、モデルは深度画像の構造を理解し、それを保持します。
画像を読み込み、深度マップを抽出してみましょう。
from diffusers.utils import load_image

img = load_image(
    "https://huggingface.co/datasets/hf-internal-testing/diffusers-images/resolve/main/kandinskyv22/cat.png"
).resize((768, 768))
img
その後、🤗 Transformers の Pipeline depth-estimation を使用して画像を処理し、深度マップを取得できます:
import torch
import numpy as np

from transformers import pipeline

def make_hint(image, depth_estimator):
    image = depth_estimator(image)["depth"]
    image = np.array(image)
    image = image[:, :, None]
    image = np.concatenate([image, image, image], axis=2)
    detected_map = torch.from_numpy(image).float() / 255.0
    hint = detected_map.permute(2, 0, 1)
    return hint

depth_estimator = pipeline("depth-estimation")
hint = make_hint(img, depth_estimator).unsqueeze(0).half().to("cuda")  # or "mps", "xpu", "cpu"
テキストから画像へ
パイプラインとKandinskyV22ControlnetPipelineを読み込みます:
from diffusers import KandinskyV22PriorPipeline, KandinskyV22ControlnetPipeline

prior_pipeline = KandinskyV22PriorPipeline.from_pretrained(
    "kandinsky-community/kandinsky-2-2-prior", dtype=torch.float16, use_safetensors=True
).to("cuda")  # or "mps", "xpu", "cpu"

pipeline = KandinskyV22ControlnetPipeline.from_pretrained(
    "kandinsky-community/kandinsky-2-2-controlnet-depth", dtype=torch.float16
).to("cuda")
プロンプトとネガティブプロンプトから画像埋め込みを生成します:
prompt = "A robot, 4k photo"
negative_prior_prompt = "lowres, text, error, cropped, worst quality, low quality, jpeg artifacts, ugly, duplicate, morbid, mutilated, out of frame, extra fingers, mutated hands, poorly drawn hands, poorly drawn face, mutation, deformed, blurry, dehydrated, bad anatomy, bad proportions, extra limbs, cloned face, disfigured, gross proportions, malformed limbs, missing arms, missing legs, extra arms, extra legs, fused fingers, too many fingers, long neck, username, watermark, signature"

generator = torch.Generator(device="cuda").manual_seed(43)  # or "mps", "xpu", "cpu"

image_emb, zero_image_emb = prior_pipeline(
    prompt=prompt, negative_prompt=negative_prior_prompt, generator=generator
).to_tuple()最後に、画像埋め込みと深度画像をKandinskyV22ControlnetPipelineに渡して、画像を生成します:
image = pipeline(image_embeds=image_emb, negative_image_embeds=zero_image_emb, hint=hint, num_inference_steps=50, generator=generator, height=768, width=768).images[0]
image
画像から画像へ
ControlNet を用いた画像から画像への生成には、以下を使用する必要があります。
- KandinskyV22PriorEmb2EmbPipeline を使用して、テキストプロンプトと画像から画像埋め込みを生成します
- 初期画像と画像埋め込みから画像を生成するためにKandinskyV22ControlnetImg2ImgPipelineを使用します
🤗 Transformers の Pipeline depth-estimation を使用して、猫の初期画像の深度マップを処理して抽出します:
import torch
import numpy as np

from diffusers import KandinskyV22PriorEmb2EmbPipeline, KandinskyV22ControlnetImg2ImgPipeline
from diffusers.utils import load_image
from transformers import pipeline

img = load_image(
    "https://huggingface.co/datasets/hf-internal-testing/diffusers-images/resolve/main/kandinskyv22/cat.png"
).resize((768, 768))

def make_hint(image, depth_estimator):
    image = depth_estimator(image)["depth"]
    image = np.array(image)
    image = image[:, :, None]
    image = np.concatenate([image, image, image], axis=2)
    detected_map = torch.from_numpy(image).float() / 255.0
    hint = detected_map.permute(2, 0, 1)
    return hint

depth_estimator = pipeline("depth-estimation")
hint = make_hint(img, depth_estimator).unsqueeze(0).half().to("cuda")  # or "mps", "xpu", "cpu"
以前の pipeline と KandinskyV22ControlnetImg2ImgPipeline を読み込みます:
prior_pipeline = KandinskyV22PriorEmb2EmbPipeline.from_pretrained(
    "kandinsky-community/kandinsky-2-2-prior", dtype=torch.float16, use_safetensors=True
).to("cuda")  # or "mps", "xpu", "cpu"

pipeline = KandinskyV22ControlnetImg2ImgPipeline.from_pretrained(
    "kandinsky-community/kandinsky-2-2-controlnet-depth", dtype=torch.float16
).to("cuda")
テキストプロンプトと初期画像を prior パイプラインに渡して、画像の埋め込みを生成します:
prompt = "A robot, 4k photo"
negative_prior_prompt = "lowres, text, error, cropped, worst quality, low quality, jpeg artifacts, ugly, duplicate, morbid, mutilated, out of frame, extra fingers, mutated hands, poorly drawn hands, poorly drawn face, mutation, deformed, blurry, dehydrated, bad anatomy, bad proportions, extra limbs, cloned face, disfigured, gross proportions, malformed limbs, missing arms, missing legs, extra arms, extra legs, fused fingers, too many fingers, long neck, username, watermark, signature"

generator = torch.Generator(device="cuda").manual_seed(43)  # or "mps", "xpu", "cpu"

img_emb = prior_pipeline(prompt=prompt, image=img, strength=0.85, generator=generator)
negative_emb = prior_pipeline(prompt=negative_prior_prompt, image=img, strength=1, generator=generator)これで、初期画像と画像埋め込みから画像を生成するためにKandinskyV22ControlnetImg2ImgPipelineを実行できます。
image = pipeline(image=img, strength=0.5, image_embeds=img_emb.image_embeds, negative_image_embeds=negative_emb.image_embeds, hint=hint, num_inference_steps=50, generator=generator, height=768, width=768).images[0]
make_image_grid([img.resize((512, 512)), image.resize((512, 512))], rows=1, cols=2)
最適化
Kandinsky は、マッピングを生成するための事前のパイプラインと、潜変数(latents)を画像にデコードするための第2のパイプラインの両方を必要とする点で独特です。計算の大部分は第2のパイプラインで行われるため、最適化の努力はそちらに集中させるべきです。以下は、推論時の Kandinsky のパフォーマンスを向上させるためのヒントです。
- PyTorch < 2.0 を使用している場合は、xFormers を有効にしてください。
  from diffusers import DiffusionPipeline
  import torch

  pipe = DiffusionPipeline.from_pretrained("kandinsky-community/kandinsky-2-1", dtype=torch.float16)
+ pipe.enable_xformers_memory_efficient_attention()torch.compileを有効にすると、PyTorch >= 2.0 を使用している場合に、スケーリングドットプロダクトアテンション(SDPA)が自動的に使用されます。
  pipe.unet.to(memory_format=torch.channels_last)
+ pipe.unet = torch.compile(pipe.unet, mode="reduce-overhead", fullgraph=True)
これは、アテンションプロセッサとして AttnAddedKVProcessor2_0 を明示的に設定する場合と同じです:
from diffusers.models.attention_processor import AttnAddedKVProcessor2_0

pipe.unet.set_attn_processor(AttnAddedKVProcessor2_0())- メモリ不足エラーを回避するために、enable_model_cpu_offload() を使用してモデルを CPU にオフロードします:
  from diffusers import DiffusionPipeline
  import torch

  pipe = DiffusionPipeline.from_pretrained("kandinsky-community/kandinsky-2-1", dtype=torch.float16)
+ pipe.enable_model_cpu_offload()- デフォルトでは、テキストから画像を生成するパイプラインはDDIMSchedulerを使用しますが、DDPMSchedulerなどの別のスケジューラーに置き換えることで、推論速度と画像品質のトレードオフにどのように影響するかを確認できます。
from diffusers import DDPMScheduler
from diffusers import DiffusionPipeline

scheduler = DDPMScheduler.from_pretrained("kandinsky-community/kandinsky-2-1", subfolder="ddpm_scheduler")
pipe = DiffusionPipeline.from_pretrained("kandinsky-community/kandinsky-2-1", scheduler=scheduler, dtype=torch.float16, use_safetensors=True).to("cuda")  # or "mps", "xpu", "cpu"
KandinskyPriorPipeline
クラス diffusers.KandinskyPriorPipeline
< source >( prior: PriorTransformerimage_encoder: CLIPVisionModelWithProjectiontext_encoder: CLIPTextModelWithProjectiontokenizer: CLIPTokenizerscheduler: UnCLIPSchedulerimage_processor: CLIPImageProcessorPil )
パラメータ
- prior (PriorTransformer) — テキスト埋め込みから画像埋め込みを近似するための、正規の unCLIP 事前分布モデル。
- image_encoder (
CLIPVisionModelWithProjection) — 凍結された画像エンコーダーです。 - text_encoder (
CLIPTextModelWithProjection) — 凍結されたテキストエンコーダー。 - tokenizer (
CLIPTokenizer) — CLIPTokenizer クラスのトークナイザー。 - scheduler (
UnCLIPScheduler) —priorと組み合わせて画像埋め込みを生成するために使用するスケジューラーです。
Kandinsky用の画像事前分布を生成するためのPipeline
このモデルは DiffusionPipeline を継承しています。すべてのパイプラインに対してライブラリが実装している汎用的なメソッド(ダウンロードや保存、特定のデバイスでの実行など)については、スーパークラスのドキュメントを参照してください。
__call__
< source >( prompt: str | list[str]negative_prompt: str | list[str] | None = Nonenum_images_per_prompt: int = 1num_inference_steps: int = 25generator: typing.Union[torch.Generator, list[torch.Generator], NoneType] = Nonelatents: typing.Optional[torch.Tensor] = Noneguidance_scale: float = 4.0output_type: str | None = 'pt'return_dict: bool = True ) → KandinskyPriorPipelineOutput or tuple
パラメータ
- prompt (
strまたはlist[str]) — 画像生成をガイドするためのプロンプト、またはプロンプトのリスト。 - negative_prompt (
strまたはlist[str]、省略可) — 画像生成をガイドしないプロンプトです。ガイダンスを使用していない場合は無視されます(guidance_scaleが1未満の場合は無視されます)。 - num_images_per_prompt (
int、任意、デフォルトは 1) — プロンプトごとに生成する画像の数。 - num_inference_steps (
int、任意、デフォルト値は 25)— デノイジングのステップ数です。デノイジングのステップ数を増やすと、推論速度が遅くなる代わりに、通常はより高品質な画像が得られます。 - generator (
torch.Generatorまたはlist[torch.Generator]、省略可) — 生成を決定論的にするためのtorch ジェネレーター1つまたはリスト。 - latents (
torch.Tensor, 任意) — 画像生成の入力として使用する、ガウス分布からサンプリングされた事前生成されたノイズ付き潜在変数。異なるプロンプトで同じ生成を調整するために使用できます。指定されない場合、指定されたランダムgeneratorを使用してサンプリングを行い、潜在変数テンソルが生成されます。 - guidance_scale (
float、任意、デフォルト値は 4.0) — Classifier-Free Diffusion Guidance で定義されているガイダンススケールです。guidance_scaleは、Imagen Paper の式 2 のwとして定義されています。guidance_scale > 1を設定することでガイダンススケールが有効になります。ガイダンススケールを高くすると、promptのテキストと密接に関連した画像の生成が促されますが、通常は画像の品質が低下する傾向があります。 - output_type (
str, 任意、デフォルトは"pt") — 画像生成の出力形式です。"np"(np.array) または"pt"(torch.Tensor) から選択します。 - return_dict (
bool、省略可能、デフォルトはTrue) —Trueの場合、通常のタプルではなく ImagePipelineOutput を返します。
戻り値
KandinskyPriorPipelineOutput または tuple
生成用のパイプラインを呼び出したときに実行される関数。
例:
>>> from diffusers import KandinskyPipeline, KandinskyPriorPipeline
>>> import torch

>>> pipe_prior = KandinskyPriorPipeline.from_pretrained("kandinsky-community/kandinsky-2-1-prior")
>>> pipe_prior.to("cuda")

>>> prompt = "red cat, 4k photo"
>>> out = pipe_prior(prompt)
>>> image_emb = out.image_embeds
>>> negative_image_emb = out.negative_image_embeds

>>> pipe = KandinskyPipeline.from_pretrained("kandinsky-community/kandinsky-2-1")
>>> pipe.to("cuda")

>>> image = pipe(
...     prompt,
...     image_embeds=image_emb,
...     negative_image_embeds=negative_image_emb,
...     height=768,
...     width=768,
...     num_inference_steps=100,
... ).images

>>> image[0].save("cat.png")
interpolate
< source >( images_and_prompts: listweights: listnum_images_per_prompt: int = 1num_inference_steps: int = 25generator: typing.Union[torch.Generator, list[torch.Generator], NoneType] = Nonelatents: typing.Optional[torch.Tensor] = Nonenegative_prior_prompt: str | None = Nonenegative_prompt: str = ''guidance_scale: float = 4.0device = None ) → KandinskyPriorPipelineOutput or tuple
パラメータ
- images_and_prompts (
list[str | PIL.Image.Image | torch.Tensor]) — 画像生成をガイドするためのプロンプトと画像のリスト。 - weights — (
list[float]):images_and_prompts内の各条件に対する重みのリスト - num_images_per_prompt (
int、任意、デフォルトは 1) — プロンプトごとに生成する画像の数。 - num_inference_steps (
int、任意、デフォルト値は 25)— デノイジングのステップ数です。デノイジングのステップ数を増やすと、推論速度が遅くなる代わりに、通常はより高品質な画像が得られます。 - generator (
torch.Generatorまたはlist[torch.Generator]、省略可) — 生成を決定論的にするためのtorch ジェネレーター1つまたはリスト。 - latents (
torch.Tensor, 任意) — 画像生成の入力として使用する、ガウス分布からサンプリングされた事前生成されたノイズ付き潜在変数。異なるプロンプトで同じ生成を調整するために使用できます。指定されない場合、指定されたランダムgeneratorを使用してサンプリングを行い、潜在変数テンソルが生成されます。 - negative_prior_prompt (
str, 省略可) — 事前拡散プロセスをガイドしないためのプロンプトです。ガイダンスを使用していない場合は無視されます(つまり、guidance_scaleが1未満の場合は無視されます)。 - negative_prompt (
strまたはlist[str]、任意) — 画像生成を導かないためのプロンプトです。ガイダンスを使用していない場合は無視されます(つまり、guidance_scaleが1未満の場合は無視されます)。 - guidance_scale (
float、任意、デフォルト値は 4.0) — Classifier-Free Diffusion Guidance で定義されているガイダンススケールです。guidance_scaleは、Imagen Paper の式 2 のwとして定義されています。guidance_scale > 1を設定することでガイダンススケールが有効になります。ガイダンススケールを高くすると、promptのテキストと密接に関連した画像の生成が促されますが、通常は画像の品質が低下する傾向があります。
戻り値
KandinskyPriorPipelineOutput または tuple
補間のために先行パイプラインを使用する際に呼び出される関数。
例:
>>> from diffusers import KandinskyPriorPipeline, KandinskyPipeline
>>> from diffusers.utils import load_image
>>> import PIL

>>> import torch
>>> from torchvision import transforms

>>> pipe_prior = KandinskyPriorPipeline.from_pretrained(
...     "kandinsky-community/kandinsky-2-1-prior", torch_dtype=torch.float16
... )
>>> pipe_prior.to("cuda")

>>> img1 = load_image(
...     "https://huggingface.co/datasets/hf-internal-testing/diffusers-images/resolve/main"
...     "/kandinsky/cat.png"
... )

>>> img2 = load_image(
...     "https://huggingface.co/datasets/hf-internal-testing/diffusers-images/resolve/main"
...     "/kandinsky/starry_night.jpeg"
... )

>>> images_texts = ["a cat", img1, img2]
>>> weights = [0.3, 0.3, 0.4]
>>> image_emb, zero_image_emb = pipe_prior.interpolate(images_texts, weights)

>>> pipe = KandinskyPipeline.from_pretrained("kandinsky-community/kandinsky-2-1", torch_dtype=torch.float16)
>>> pipe.to("cuda")

>>> image = pipe(
...     "",
...     image_embeds=image_emb,
...     negative_image_embeds=zero_image_emb,
...     height=768,
...     width=768,
...     num_inference_steps=150,
... ).images[0]

>>> image.save("starry_cat.png")
KandinskyPipeline
class diffusers.KandinskyPipeline
< source >( text_encoder: MultilingualCLIPtokenizer: XLMRobertaTokenizerunet: UNet2DConditionModelscheduler: diffusers.schedulers.scheduling_ddim.DDIMScheduler | diffusers.schedulers.scheduling_ddpm.DDPMSchedulermovq: VQModel )
パラメータ
- text_encoder (
MultilingualCLIP) — 凍結されたテキストエンコーダー。 - tokenizer (
XLMRobertaTokenizer) — クラス - scheduler (
DDIMScheduler|DDPMScheduler) —unetと組み合わせて使用し、画像の潜在変数を生成するためのスケジューラです。 - unet (UNet2DConditionModel) — 画像エンベディングのノイズ除去を行う条件付き U-Net アーキテクチャ。
- movq (VQModel) — 潜在変数から画像を生成するための MoVQ デコーダー。
Kandinsky を使用したテキストから画像への生成パイプライン
このモデルは DiffusionPipeline を継承しています。すべてのパイプラインに対してライブラリが実装している汎用的なメソッド(ダウンロードや保存、特定のデバイスでの実行など)については、スーパークラスのドキュメントを参照してください。
__call__
< source >( prompt: str | list[str]image_embeds: typing.Union[torch.Tensor, list[torch.Tensor]]negative_image_embeds: typing.Union[torch.Tensor, list[torch.Tensor]]negative_prompt: str | list[str] | None = Noneheight: int = 512width: int = 512num_inference_steps: int = 100guidance_scale: float = 4.0num_images_per_prompt: int = 1generator: typing.Union[torch.Generator, list[torch.Generator], NoneType] = Nonelatents: typing.Optional[torch.Tensor] = Noneoutput_type: str | None = 'pil'callback: typing.Optional[typing.Callable[[int, int, torch.Tensor], NoneType]] = Nonecallback_steps: int = 1return_dict: bool = True ) → ImagePipelineOutput or tuple
パラメータ
- prompt (
strまたはlist[str]) — 画像生成をガイドするためのプロンプト、またはプロンプトのリスト。 - image_embeds (
torch.Tensorまたはlist[torch.Tensor]) — テキストプロンプトのクリップ画像埋め込みです。画像生成の条件付けに使用されます。 - negative_image_embeds (
torch.Tensorまたはlist[torch.Tensor]) — ネガティブなテキストプロンプトの CLIP 画像埋め込みです。画像生成の条件付けに使用されます。 - negative_prompt (
strまたはlist[str]、省略可) — 画像生成をガイドしないプロンプトです。ガイダンスを使用していない場合は無視されます(guidance_scaleが1未満の場合は無視されます)。 - height (
int、任意、デフォルト値は 512) — 生成される画像のピクセル単位の縦幅です。 - width (
int, 任意、デフォルトは 512) — 生成される画像の幅(ピクセル単位)。 - num_inference_steps (
int、任意、デフォルト値は 100) — デノイジングのステップ数です。デノイジングのステップ数を増やすと、推論速度が遅くなる代わりに、通常はより高品質な画像が得られます。 - guidance_scale (
float、任意、デフォルト値は 4.0) — Classifier-Free Diffusion Guidance で定義されているガイダンススケールです。guidance_scaleは、Imagen Paper の式 2 のwとして定義されています。guidance_scale > 1を設定することでガイダンススケールが有効になります。ガイダンススケールを高くすると、promptのテキストと密接に関連した画像の生成が促されますが、通常は画像の品質が低下する傾向があります。 - num_images_per_prompt (
int、任意、デフォルトは 1) — プロンプトごとに生成する画像の数。 - generator (
torch.Generatorまたはlist[torch.Generator]、省略可) — 生成を決定論的にするためのtorch ジェネレーター1つまたはリスト。 - latents (
torch.Tensor, 任意) — 画像生成の入力として使用する、ガウス分布からサンプリングされた事前生成されたノイズ付き潜在変数。異なるプロンプトで同じ生成を調整するために使用できます。指定されない場合、指定されたランダムgeneratorを使用してサンプリングを行い、潜在変数テンソルが生成されます。 - output_type (
str, 任意、デフォルトは"pil") — 生成画像の出力形式です。"pil"(PIL.Image.Image)、"np"(np.array)、または"pt"(torch.Tensor) から選択してください。 - callback (
Callable, 省略可) — 推論中にcallback_stepsステップごとに呼び出される関数です。この関数は、以下の引数とともに呼び出されます:callback(step: int, timestep: int, latents: torch.Tensor)。 - callback_steps (
int、任意、デフォルトは 1) —callback関数が呼び出される頻度です。指定しない場合、callback はすべてのステップで呼び出されます。 - return_dict (
bool、省略可能、デフォルトはTrue) —Trueの場合、通常のタプルではなく ImagePipelineOutput を返します。
戻り値
ImagePipelineOutput または tuple
生成用のパイプラインを呼び出したときに実行される関数。
例:
>>> from diffusers import KandinskyPipeline, KandinskyPriorPipeline
>>> import torch

>>> pipe_prior = KandinskyPriorPipeline.from_pretrained("kandinsky-community/Kandinsky-2-1-prior")
>>> pipe_prior.to("cuda")

>>> prompt = "red cat, 4k photo"
>>> out = pipe_prior(prompt)
>>> image_emb = out.image_embeds
>>> negative_image_emb = out.negative_image_embeds

>>> pipe = KandinskyPipeline.from_pretrained("kandinsky-community/kandinsky-2-1")
>>> pipe.to("cuda")

>>> image = pipe(
...     prompt,
...     image_embeds=image_emb,
...     negative_image_embeds=negative_image_emb,
...     height=768,
...     width=768,
...     num_inference_steps=100,
... ).images

>>> image[0].save("cat.png")
KandinskyCombinedPipeline
クラス diffusers.KandinskyCombinedPipeline
< source >( text_encoder: MultilingualCLIPtokenizer: XLMRobertaTokenizerunet: UNet2DConditionModelscheduler: diffusers.schedulers.scheduling_ddim.DDIMScheduler | diffusers.schedulers.scheduling_ddpm.DDPMSchedulermovq: VQModelprior_prior: PriorTransformerprior_image_encoder: CLIPVisionModelWithProjectionprior_text_encoder: CLIPTextModelWithProjectionprior_tokenizer: CLIPTokenizerprior_scheduler: UnCLIPSchedulerprior_image_processor: CLIPImageProcessorPil )
パラメータ
- text_encoder (
MultilingualCLIP) — 凍結されたテキストエンコーダー。 - tokenizer (
XLMRobertaTokenizer) — クラス - scheduler (
DDIMScheduler|DDPMScheduler) —unetと組み合わせて使用し、画像の潜在変数を生成するためのスケジューラです。 - unet (UNet2DConditionModel) — 画像エンベディングのノイズ除去を行う条件付き U-Net アーキテクチャ。
- movq (VQModel) — 潜在変数から画像を生成するための MoVQ デコーダー。
- prior_prior (PriorTransformer) — テキスト埋め込みから画像埋め込みを近似するための、正規の unCLIP 事前分布モデルです。
- prior_image_encoder (
CLIPVisionModelWithProjection) — 凍結された画像エンコーダー。 - prior_text_encoder (
CLIPTextModelWithProjection) — 凍結されたテキストエンコーダーです。 - prior_tokenizer (
CLIPTokenizer) — クラス CLIPTokenizer のトークナイザー。 - prior_scheduler (
UnCLIPScheduler) —priorと組み合わせて画像埋め込みを生成するために使用するスケジューラです。
Kandinsky を使用したテキストから画像への生成を行う統合 Pipeline
このモデルは DiffusionPipeline を継承しています。すべてのパイプラインに対してライブラリが実装している汎用的なメソッド(ダウンロードや保存、特定のデバイスでの実行など)については、スーパークラスのドキュメントを参照してください。
__call__
< source >( prompt: str | list[str]negative_prompt: str | list[str] | None = Nonenum_inference_steps: int = 100guidance_scale: float = 4.0num_images_per_prompt: int = 1height: int = 512width: int = 512prior_guidance_scale: float = 4.0prior_num_inference_steps: int = 25generator: typing.Union[torch.Generator, list[torch.Generator], NoneType] = Nonelatents: typing.Optional[torch.Tensor] = Noneoutput_type: str | None = 'pil'callback: typing.Optional[typing.Callable[[int, int, torch.Tensor], NoneType]] = Nonecallback_steps: int = 1return_dict: bool = True ) → ImagePipelineOutput or tuple
パラメータ
- prompt (
strまたはlist[str]) — 画像生成をガイドするためのプロンプト、またはプロンプトのリスト。 - negative_prompt (
strまたはlist[str]、省略可) — 画像生成をガイドしないプロンプトです。ガイダンスを使用していない場合は無視されます(guidance_scaleが1未満の場合は無視されます)。 - num_images_per_prompt (
int、任意、デフォルトは 1) — プロンプトごとに生成する画像の数。 - num_inference_steps (
int、任意、デフォルト値は 100) — デノイジングのステップ数です。デノイジングのステップ数を増やすと、推論速度が遅くなる代わりに、通常はより高品質な画像が得られます。 - height (
int、任意、デフォルト値は 512) — 生成される画像のピクセル単位の縦幅です。 - width (
int, 任意、デフォルトは 512) — 生成される画像の幅(ピクセル単位)。 - prior_guidance_scale (
float、任意、デフォルト値は 4.0) — Classifier-Free Diffusion Guidance で定義されているガイダンススケールです。guidance_scaleは、Imagen Paper の数式 2 のwとして定義されています。guidance_scale > 1を設定することで、ガイダンススケールが有効になります。ガイダンススケールを高くすると、promptのテキストと密接に関連する画像の生成が促されますが、通常は画像の品質が低下する傾向があります。 - prior_num_inference_steps (
int、任意、デフォルト値は 100) — デノイジングのステップ数です。デノイジングのステップ数を増やすと、推論速度が遅くなる代わりに、通常はより高品質な画像が得られます。 - guidance_scale (
float、任意、デフォルト値は 4.0) — Classifier-Free Diffusion Guidance で定義されているガイダンススケールです。guidance_scaleは、Imagen Paper の式 2 のwとして定義されています。guidance_scale > 1を設定することでガイダンススケールが有効になります。ガイダンススケールを高くすると、promptのテキストと密接に関連した画像の生成が促されますが、通常は画像の品質が低下する傾向があります。 - generator (
torch.Generatorまたはlist[torch.Generator]、省略可) — 生成を決定論的にするためのtorch ジェネレーター1つまたはリスト。 - latents (
torch.Tensor, 任意) — 画像生成の入力として使用する、ガウス分布からサンプリングされた事前生成されたノイズ付き潜在変数。異なるプロンプトで同じ生成を調整するために使用できます。指定されない場合、指定されたランダムgeneratorを使用してサンプリングを行い、潜在変数テンソルが生成されます。 - output_type (
str, 省略可能、デフォルトは"pil") — 画像生成の出力形式です。"pil"(PIL.Image.Image)、"np"(np.array)、または"pt"(torch.Tensor) から選択します。 - callback (
Callable, 省略可) — 推論中にcallback_stepsステップごとに呼び出される関数です。この関数は、以下の引数とともに呼び出されます:callback(step: int, timestep: int, latents: torch.Tensor)。 - callback_steps (
int、任意、デフォルトは 1) —callback関数が呼び出される頻度です。指定しない場合、callback はすべてのステップで呼び出されます。 - return_dict (
bool、省略可能、デフォルトはTrue) —Trueの場合、通常のタプルではなく ImagePipelineOutput を返します。
戻り値
ImagePipelineOutput または tuple
生成用のパイプラインを呼び出したときに実行される関数。
例:
from diffusers import AutoPipelineForText2Image
import torch

pipe = AutoPipelineForText2Image.from_pretrained(
    "kandinsky-community/kandinsky-2-1", torch_dtype=torch.float16
)
pipe.enable_model_cpu_offload()

prompt = "A lion in galaxies, spirals, nebulae, stars, smoke, iridescent, intricate detail, octane render, 8k"

image = pipe(prompt=prompt, num_inference_steps=25).images[0]
enable_sequential_cpu_offload
< source >( gpu_id: int | None = Nonedevice: typing.Union[torch.device, str] = None )
🤗 Accelerate を使用して、すべてのモデル(unet、text_encoder、vae、および safety checker の state dict)を CPU にオフロードし、メモリ使用量を大幅に削減します。モデルは torch.device('meta') に移動され、特定のサブモジュールの forward メソッドが呼び出されたときにのみ GPU にロードされます。オフロードはサブモジュール単位で行われます。enable_model_cpu_offload を使用する場合よりもメモリ削減効果は高いですが、パフォーマンスは低くなります。
KandinskyImg2ImgPipeline
クラス diffusers.KandinskyImg2ImgPipeline
< source >( text_encoder: MultilingualCLIPmovq: VQModeltokenizer: XLMRobertaTokenizerunet: UNet2DConditionModelscheduler: DDIMScheduler )
パラメータ
- text_encoder (
MultilingualCLIP) — 凍結されたテキストエンコーダー。 - tokenizer (
XLMRobertaTokenizer) — クラス - scheduler (DDIMScheduler) —
unetと組み合わせて使用し、画像の潜在変数を生成するためのスケジューラ。 - unet (UNet2DConditionModel) — 画像エンベディングのノイズ除去を行う条件付き U-Net アーキテクチャ。
- movq (VQModel) — MoVQ 画像エンコーダーおよびデコーダー
Kandinsky を使用した画像から画像への生成のための Pipeline
このモデルは DiffusionPipeline を継承しています。すべてのパイプラインに対してライブラリが実装している汎用的なメソッド(ダウンロードや保存、特定のデバイスでの実行など)については、スーパークラスのドキュメントを参照してください。
__call__
< source >( prompt: str | list[str]image: typing.Union[torch.Tensor, list[torch.Tensor], PIL.Image.Image, list[PIL.Image.Image]]image_embeds: Tensornegative_image_embeds: Tensornegative_prompt: str | list[str] | None = Noneheight: int = 512width: int = 512num_inference_steps: int = 100strength: float = 0.3guidance_scale: float = 7.0num_images_per_prompt: int = 1generator: typing.Union[torch.Generator, list[torch.Generator], NoneType] = Noneoutput_type: str | None = 'pil'callback: typing.Optional[typing.Callable[[int, int, torch.Tensor], NoneType]] = Nonecallback_steps: int = 1return_dict: bool = True ) → ImagePipelineOutput or tuple
パラメータ
- prompt (
strまたはlist[str]) — 画像生成をガイドするためのプロンプト、またはプロンプトのリスト。 - image (
torch.Tensor、PIL.Image.Image) — プロセスの開始点として使用されるImage、または画像バッチを表すテンソル。 - image_embeds (
torch.Tensorまたはlist[torch.Tensor]) — テキストプロンプトのクリップ画像埋め込みです。画像生成の条件付けに使用されます。 - negative_image_embeds (
torch.Tensorまたはlist[torch.Tensor]) — ネガティブなテキストプロンプトの CLIP 画像埋め込みです。画像生成の条件付けに使用されます。 - negative_prompt (
strまたはlist[str]、省略可) — 画像生成をガイドしないプロンプトです。ガイダンスを使用していない場合は無視されます(guidance_scaleが1未満の場合は無視されます)。 - height (
int、任意、デフォルト値は 512) — 生成される画像のピクセル単位の縦幅です。 - width (
int, 任意、デフォルトは 512) — 生成される画像の幅(ピクセル単位)。 - num_inference_steps (
int、任意、デフォルト値は 100) — デノイジングのステップ数です。デノイジングのステップ数を増やすと、推論速度が遅くなる代わりに、通常はより高品質な画像が得られます。 - strength (
float, 任意、デフォルト値は 0.3) — 概念的には、参照となるimageをどの程度変換するかを示します。0 から 1 の間の値である必要があります。imageは開始点として使用され、strengthが大きいほど、それに対してより多くのノイズが追加されます。 デノイジングのステップ数は、最初に追加されるノイズの量に依存します。strengthが 1 の場合、追加されるノイズは最大となり、デノイジングプロセスはnum_inference_stepsで指定された全イテレーション数分実行されます。したがって、値が 1 の場合、imageは実質的に無視されます。 - guidance_scale (
float、任意、デフォルト値は 4.0) — Classifier-Free Diffusion Guidance で定義されているガイダンススケールです。guidance_scaleは、Imagen Paper の式 2 のwとして定義されています。guidance_scale > 1を設定することでガイダンススケールが有効になります。ガイダンススケールを高くすると、promptのテキストと密接に関連した画像の生成が促されますが、通常は画像の品質が低下する傾向があります。 - num_images_per_prompt (
int、任意、デフォルトは 1) — プロンプトごとに生成する画像の数。 - generator (
torch.Generatorまたはlist[torch.Generator]、省略可) — 生成を決定論的にするためのtorch ジェネレーター1つまたはリスト。 - output_type (
str, 任意、デフォルトは"pil") — 生成画像の出力形式です。"pil"(PIL.Image.Image)、"np"(np.array)、または"pt"(torch.Tensor) から選択してください。 - callback (
Callable, 省略可) — 推論中にcallback_stepsステップごとに呼び出される関数です。この関数は、以下の引数とともに呼び出されます:callback(step: int, timestep: int, latents: torch.Tensor)。 - callback_steps (
int、任意、デフォルトは 1) —callback関数が呼び出される頻度です。指定しない場合、callback はすべてのステップで呼び出されます。 - return_dict (
bool、省略可能、デフォルトはTrue) —Trueの場合、通常のタプルではなく ImagePipelineOutput を返します。
戻り値
ImagePipelineOutput または tuple
生成用のパイプラインを呼び出したときに実行される関数。
例:
>>> from diffusers import KandinskyImg2ImgPipeline, KandinskyPriorPipeline
>>> from diffusers.utils import load_image
>>> import torch

>>> pipe_prior = KandinskyPriorPipeline.from_pretrained(
...     "kandinsky-community/kandinsky-2-1-prior", torch_dtype=torch.float16
... )
>>> pipe_prior.to("cuda")

>>> prompt = "A red cartoon frog, 4k"
>>> image_emb, zero_image_emb = pipe_prior(prompt, return_dict=False)

>>> pipe = KandinskyImg2ImgPipeline.from_pretrained(
...     "kandinsky-community/kandinsky-2-1", torch_dtype=torch.float16
... )
>>> pipe.to("cuda")

>>> init_image = load_image(
...     "https://huggingface.co/datasets/hf-internal-testing/diffusers-images/resolve/main"
...     "/kandinsky/frog.png"
... )

>>> image = pipe(
...     prompt,
...     image=init_image,
...     image_embeds=image_emb,
...     negative_image_embeds=zero_image_emb,
...     height=768,
...     width=768,
...     num_inference_steps=100,
...     strength=0.2,
... ).images

>>> image[0].save("red_frog.png")
KandinskyImg2ImgCombinedPipeline
クラス diffusers.KandinskyImg2ImgCombinedPipeline
< source >( text_encoder: MultilingualCLIPtokenizer: XLMRobertaTokenizerunet: UNet2DConditionModelscheduler: diffusers.schedulers.scheduling_ddim.DDIMScheduler | diffusers.schedulers.scheduling_ddpm.DDPMSchedulermovq: VQModelprior_prior: PriorTransformerprior_image_encoder: CLIPVisionModelWithProjectionprior_text_encoder: CLIPTextModelWithProjectionprior_tokenizer: CLIPTokenizerprior_scheduler: UnCLIPSchedulerprior_image_processor: CLIPImageProcessorPil )
パラメータ
- text_encoder (
MultilingualCLIP) — 凍結されたテキストエンコーダー。 - tokenizer (
XLMRobertaTokenizer) — クラス - scheduler (
DDIMScheduler|DDPMScheduler) —unetと組み合わせて使用し、画像の潜在変数を生成するためのスケジューラです。 - unet (UNet2DConditionModel) — 画像エンベディングのノイズ除去を行う条件付き U-Net アーキテクチャ。
- movq (VQModel) — 潜在変数から画像を生成するための MoVQ デコーダー。
- prior_prior (PriorTransformer) — テキスト埋め込みから画像埋め込みを近似するための、正規の unCLIP 事前分布モデルです。
- prior_image_encoder (
CLIPVisionModelWithProjection) — 凍結された画像エンコーダー。 - prior_text_encoder (
CLIPTextModelWithProjection) — 凍結されたテキストエンコーダーです。 - prior_tokenizer (
CLIPTokenizer) — クラス CLIPTokenizer のトークナイザー。 - prior_scheduler (
UnCLIPScheduler) —priorと組み合わせて画像埋め込みを生成するために使用するスケジューラです。
Kandinsky を用いた画像から画像への生成のための統合 Pipeline
このモデルは DiffusionPipeline を継承しています。すべてのパイプラインに対してライブラリが実装している汎用的なメソッド(ダウンロードや保存、特定のデバイスでの実行など)については、スーパークラスのドキュメントを参照してください。
__call__
< source >( prompt: str | list[str]image: typing.Union[torch.Tensor, list[torch.Tensor], PIL.Image.Image, list[PIL.Image.Image]]negative_prompt: str | list[str] | None = Nonenum_inference_steps: int = 100guidance_scale: float = 4.0num_images_per_prompt: int = 1strength: float = 0.3height: int = 512width: int = 512prior_guidance_scale: float = 4.0prior_num_inference_steps: int = 25generator: typing.Union[torch.Generator, list[torch.Generator], NoneType] = Nonelatents: typing.Optional[torch.Tensor] = Noneoutput_type: str | None = 'pil'callback: typing.Optional[typing.Callable[[int, int, torch.Tensor], NoneType]] = Nonecallback_steps: int = 1return_dict: bool = True ) → ImagePipelineOutput or tuple
パラメータ
- prompt (
strまたはlist[str]) — 画像生成をガイドするためのプロンプト、またはプロンプトのリスト。 - image (
torch.Tensor、PIL.Image.Image、np.ndarray、list[torch.Tensor]、list[PIL.Image.Image]、またはlist[np.ndarray]) — プロセスの開始点として使用されるImage、または画像バッチを表すテンソルです。直接ラテンツを渡す場合は、imageとして画像ラテンツを受け入れることもでき、その場合は再度エンコードされません。 - negative_prompt (
strまたはlist[str]、省略可) — 画像生成をガイドしないプロンプトです。ガイダンスを使用していない場合は無視されます(guidance_scaleが1未満の場合は無視されます)。 - num_images_per_prompt (
int、任意、デフォルトは 1) — プロンプトごとに生成する画像の数。 - num_inference_steps (
int、任意、デフォルト値は 100) — デノイジングのステップ数です。デノイジングのステップ数を増やすと、推論速度が遅くなる代わりに、通常はより高品質な画像が得られます。 - height (
int、任意、デフォルト値は 512) — 生成される画像のピクセル単位の縦幅です。 - width (
int, 任意、デフォルトは 512) — 生成される画像の幅(ピクセル単位)。 - strength (
float, 任意、デフォルト値は 0.3) — 概念的には、参照となるimageをどの程度変換するかを示します。0 から 1 の間の値である必要があります。imageは開始点として使用され、strengthが大きいほど、それに加えられるノイズ量が増えます。 デノイジングのステップ数は、最初に追加されるノイズ量に依存します。strengthが 1 の場合、追加されるノイズは最大となり、デノイジングプロセスはnum_inference_stepsで指定された全イテレーション数分実行されます。したがって、値が 1 の場合、imageは実質的に無視されます。 - prior_guidance_scale (
float、任意、デフォルト値は 4.0) — Classifier-Free Diffusion Guidanceで定義されているガイダンススケールです。guidance_scaleは、Imagen Paperの式 2 のwとして定義されています。guidance_scale > 1を設定することで、ガイダンススケールが有効になります。ガイダンススケールを高くすると、promptのテキストと密接に関連する画像の生成が促されますが、通常は画像の品質が低下する傾向があります。 - prior_num_inference_steps (
int、任意、デフォルト値は 100) — デノイジングのステップ数です。デノイジングのステップ数を増やすと、推論速度が遅くなる代わりに、通常はより高品質な画像が得られます。 - guidance_scale (
float、任意、デフォルト値は 4.0) — Classifier-Free Diffusion Guidance で定義されているガイダンススケールです。guidance_scaleは、Imagen Paper の式 2 のwとして定義されています。guidance_scale > 1を設定することでガイダンススケールが有効になります。ガイダンススケールを高くすると、promptのテキストと密接に関連した画像の生成が促されますが、通常は画像の品質が低下する傾向があります。 - generator (
torch.Generatorまたはlist[torch.Generator]、省略可) — 生成を決定論的にするためのtorch ジェネレーター1つまたはリスト。 - latents (
torch.Tensor, 任意) — 画像生成の入力として使用する、ガウス分布からサンプリングされた事前生成されたノイズ付き潜在変数。異なるプロンプトで同じ生成を調整するために使用できます。指定されない場合、指定されたランダムgeneratorを使用してサンプリングを行い、潜在変数テンソルが生成されます。 - output_type (
str, 省略可能、デフォルトは"pil") — 画像生成の出力形式です。"pil"(PIL.Image.Image)、"np"(np.array)、または"pt"(torch.Tensor) から選択します。 - callback (
Callable, 省略可) — 推論中にcallback_stepsステップごとに呼び出される関数です。この関数は、以下の引数とともに呼び出されます:callback(step: int, timestep: int, latents: torch.Tensor)。 - callback_steps (
int、任意、デフォルトは 1) —callback関数が呼び出される頻度です。指定しない場合、callback はすべてのステップで呼び出されます。 - return_dict (
bool、省略可能、デフォルトはTrue) —Trueの場合、通常のタプルではなく ImagePipelineOutput を返します。
戻り値
ImagePipelineOutput または tuple
生成用のパイプラインを呼び出したときに実行される関数。
例:
from diffusers import AutoPipelineForImage2Image
import torch
import requests
from io import BytesIO
from PIL import Image
import os

pipe = AutoPipelineForImage2Image.from_pretrained(
    "kandinsky-community/kandinsky-2-1", torch_dtype=torch.float16
)
pipe.enable_model_cpu_offload()

prompt = "A fantasy landscape, Cinematic lighting"
negative_prompt = "low quality, bad quality"

url = "https://raw.githubusercontent.com/CompVis/stable-diffusion/main/assets/stable-samples/img2img/sketch-mountains-input.jpg"

response = requests.get(url)
image = Image.open(BytesIO(response.content)).convert("RGB")
image.thumbnail((768, 768))

image = pipe(prompt=prompt, image=original_image, num_inference_steps=25).images[0]
enable_sequential_cpu_offload
< source >( gpu_id: int | None = Nonedevice: typing.Union[torch.device, str] = None )
Offloads all models to CPU using accelerate, significantly reducing memory usage. When called, unet,
text_encoder, vae and safety checker have their state dicts saved to CPU and then are moved to a torch.device('meta') and loaded to GPU only when their specific submodule has itsforwardmethod called. Note that offloading happens on a submodule basis. Memory savings are higher than withenable_model_cpu_offload`, but performance is lower.
KandinskyInpaintPipeline
class diffusers.KandinskyInpaintPipeline
< source >( text_encoder: MultilingualCLIPmovq: VQModeltokenizer: XLMRobertaTokenizerunet: UNet2DConditionModelscheduler: DDIMScheduler )
パラメータ
- text_encoder (
MultilingualCLIP) — 凍結されたテキストエンコーダー。 - tokenizer (
XLMRobertaTokenizer) — クラス - scheduler (DDIMScheduler) —
unetと組み合わせて使用し、画像の潜在変数を生成するためのスケジューラ。 - unet (UNet2DConditionModel) — 画像エンベディングのノイズ除去を行う条件付き U-Net アーキテクチャ。
- movq (VQModel) — MoVQ 画像エンコーダーおよびデコーダー
Kandinsky2.1 を用いたテキストガイド型画像インペインティングのパイプライン
このモデルは DiffusionPipeline を継承しています。すべてのパイプラインに対してライブラリが実装している汎用的なメソッド(ダウンロードや保存、特定のデバイスでの実行など)については、スーパークラスのドキュメントを参照してください。
__call__
< source >( prompt: str | list[str]image: typing.Union[torch.Tensor, PIL.Image.Image]mask_image: typing.Union[PIL.Image.Image, torch.Tensor, numpy.ndarray]image_embeds: Tensornegative_image_embeds: Tensornegative_prompt: str | list[str] | None = Noneheight: int = 512width: int = 512num_inference_steps: int = 100guidance_scale: float = 4.0num_images_per_prompt: int = 1generator: typing.Union[torch.Generator, list[torch.Generator], NoneType] = Nonelatents: typing.Optional[torch.Tensor] = Noneoutput_type: str | None = 'pil'callback: typing.Optional[typing.Callable[[int, int, torch.Tensor], NoneType]] = Nonecallback_steps: int = 1return_dict: bool = True ) → ImagePipelineOutput or tuple
パラメータ
- prompt (
strまたはlist[str]) — 画像生成をガイドするためのプロンプト、またはプロンプトのリスト。 - image (
torch.Tensor、PIL.Image.Imageまたはnp.ndarray) —Image、または画像バッチを表すテンソル。このプロセスの開始点として使用されます。 - mask_image (
PIL.Image.Image、torch.Tensorまたはnp.ndarray) —imageをマスクするためのImage、または画像バッチを表すテンソルです。マスク内の白いピクセルは再描画され、黒いピクセルは保持されます。マスクとして PyTorch テンソルを渡すことができるのは、渡した画像が PyTorch テンソルである場合のみです。また、3 つのカラーチャネルではなく 1 つのカラーチャネル (L) を含める必要があるため、期待される形状は(B, 1, H, W,)、(B, H, W)、(1, H, W)または(H, W)のいずれかになります。画像が PIL 画像または NumPy 配列である場合、マスクも PIL 画像または NumPy 配列である必要があります。PIL 画像の場合、使用前に単一チャネル (輝度) に変換されます。NumPy 配列の場合、期待される形状は(H, W)です。 - image_embeds (
torch.Tensorまたはlist[torch.Tensor]) — テキストプロンプトのクリップ画像埋め込みです。画像生成の条件付けに使用されます。 - negative_image_embeds (
torch.Tensorまたはlist[torch.Tensor]) — ネガティブなテキストプロンプトの CLIP 画像埋め込みです。画像生成の条件付けに使用されます。 - negative_prompt (
strまたはlist[str]、省略可) — 画像生成をガイドしないプロンプトです。ガイダンスを使用していない場合は無視されます(guidance_scaleが1未満の場合は無視されます)。 - height (
int、任意、デフォルト値は 512) — 生成される画像のピクセル単位の縦幅です。 - width (
int, 任意、デフォルトは 512) — 生成される画像の幅(ピクセル単位)。 - num_inference_steps (
int、任意、デフォルト値は 100) — デノイジングのステップ数です。デノイジングのステップ数を増やすと、推論速度が遅くなる代わりに、通常はより高品質な画像が得られます。 - guidance_scale (
float、任意、デフォルト値は 4.0) — Classifier-Free Diffusion Guidance で定義されているガイダンススケールです。guidance_scaleは、Imagen Paper の式 2 のwとして定義されています。guidance_scale > 1を設定することでガイダンススケールが有効になります。ガイダンススケールを高くすると、promptのテキストと密接に関連した画像の生成が促されますが、通常は画像の品質が低下する傾向があります。 - num_images_per_prompt (
int、任意、デフォルトは 1) — プロンプトごとに生成する画像の数。 - generator (
torch.Generatorまたはlist[torch.Generator]、省略可) — 生成を決定論的にするためのtorch ジェネレーター1つまたはリスト。 - latents (
torch.Tensor, 任意) — 画像生成の入力として使用する、ガウス分布からサンプリングされた事前生成されたノイズ付き潜在変数。異なるプロンプトで同じ生成を調整するために使用できます。指定されない場合、指定されたランダムgeneratorを使用してサンプリングを行い、潜在変数テンソルが生成されます。 - output_type (
str, 省略可能、デフォルトは"pil") — 画像生成の出力形式です。"pil"(PIL.Image.Image)、"np"(np.array)、または"pt"(torch.Tensor) から選択します。 - callback (
Callable, 省略可) — 推論中にcallback_stepsステップごとに呼び出される関数です。この関数は、以下の引数とともに呼び出されます:callback(step: int, timestep: int, latents: torch.Tensor)。 - callback_steps (
int、任意、デフォルトは 1) —callback関数が呼び出される頻度です。指定しない場合、callback はすべてのステップで呼び出されます。 - return_dict (
bool、省略可能、デフォルトはTrue) —Trueの場合、通常のタプルではなく ImagePipelineOutput を返します。
戻り値
ImagePipelineOutput または tuple
生成用のパイプラインを呼び出したときに実行される関数。
例:
>>> from diffusers import KandinskyInpaintPipeline, KandinskyPriorPipeline
>>> from diffusers.utils import load_image
>>> import torch
>>> import numpy as np

>>> pipe_prior = KandinskyPriorPipeline.from_pretrained(
...     "kandinsky-community/kandinsky-2-1-prior", torch_dtype=torch.float16
... )
>>> pipe_prior.to("cuda")

>>> prompt = "a hat"
>>> image_emb, zero_image_emb = pipe_prior(prompt, return_dict=False)

>>> pipe = KandinskyInpaintPipeline.from_pretrained(
...     "kandinsky-community/kandinsky-2-1-inpaint", torch_dtype=torch.float16
... )
>>> pipe.to("cuda")

>>> init_image = load_image(
...     "https://huggingface.co/datasets/hf-internal-testing/diffusers-images/resolve/main"
...     "/kandinsky/cat.png"
... )

>>> mask = np.zeros((768, 768), dtype=np.float32)
>>> mask[:250, 250:-250] = 1

>>> out = pipe(
...     prompt,
...     image=init_image,
...     mask_image=mask,
...     image_embeds=image_emb,
...     negative_image_embeds=zero_image_emb,
...     height=768,
...     width=768,
...     num_inference_steps=50,
... )

>>> image = out.images[0]
>>> image.save("cat_with_hat.png")
KandinskyInpaintCombinedPipeline
class diffusers.KandinskyInpaintCombinedPipeline
< source >( text_encoder: MultilingualCLIPtokenizer: XLMRobertaTokenizerunet: UNet2DConditionModelscheduler: diffusers.schedulers.scheduling_ddim.DDIMScheduler | diffusers.schedulers.scheduling_ddpm.DDPMSchedulermovq: VQModelprior_prior: PriorTransformerprior_image_encoder: CLIPVisionModelWithProjectionprior_text_encoder: CLIPTextModelWithProjectionprior_tokenizer: CLIPTokenizerprior_scheduler: UnCLIPSchedulerprior_image_processor: CLIPImageProcessorPil )
パラメータ
- text_encoder (
MultilingualCLIP) — 凍結されたテキストエンコーダー。 - tokenizer (
XLMRobertaTokenizer) — クラス - scheduler (
DDIMScheduler|DDPMScheduler) —unetと組み合わせて使用し、画像の潜在変数を生成するためのスケジューラです。 - unet (UNet2DConditionModel) — 画像エンベディングのノイズ除去を行う条件付き U-Net アーキテクチャ。
- movq (VQModel) — 潜在変数から画像を生成するための MoVQ デコーダー。
- prior_prior (PriorTransformer) — テキスト埋め込みから画像埋め込みを近似するための、正規の unCLIP 事前分布モデルです。
- prior_image_encoder (
CLIPVisionModelWithProjection) — 凍結された画像エンコーダー。 - prior_text_encoder (
CLIPTextModelWithProjection) — 凍結されたテキストエンコーダーです。 - prior_tokenizer (
CLIPTokenizer) — クラス CLIPTokenizer のトークナイザー。 - prior_scheduler (
UnCLIPScheduler) —priorと組み合わせて画像埋め込みを生成するために使用するスケジューラです。
Kandinsky を用いた生成のための統合 Pipeline
このモデルは DiffusionPipeline を継承しています。すべてのパイプラインに対してライブラリが実装している汎用的なメソッド(ダウンロードや保存、特定のデバイスでの実行など)については、スーパークラスのドキュメントを参照してください。
__call__
< source >( prompt: str | list[str]image: typing.Union[torch.Tensor, list[torch.Tensor], PIL.Image.Image, list[PIL.Image.Image]]mask_image: typing.Union[torch.Tensor, list[torch.Tensor], PIL.Image.Image, list[PIL.Image.Image]]negative_prompt: str | list[str] | None = Nonenum_inference_steps: int = 100guidance_scale: float = 4.0num_images_per_prompt: int = 1height: int = 512width: int = 512prior_guidance_scale: float = 4.0prior_num_inference_steps: int = 25generator: typing.Union[torch.Generator, list[torch.Generator], NoneType] = Nonelatents: typing.Optional[torch.Tensor] = Noneoutput_type: str | None = 'pil'callback: typing.Optional[typing.Callable[[int, int, torch.Tensor], NoneType]] = Nonecallback_steps: int = 1return_dict: bool = True ) → ImagePipelineOutput or tuple
パラメータ
- prompt (
strまたはlist[str]) — 画像生成をガイドするためのプロンプト、またはプロンプトのリスト。 - image (
torch.Tensor、PIL.Image.Image、np.ndarray、list[torch.Tensor]、list[PIL.Image.Image]、またはlist[np.ndarray]) — プロセスの起点として使用されるImage、または画像バッチを表すテンソルです。直接ラテンツを渡す場合は、imageとして画像ラテンツを受け入れることもでき、その場合は再度エンコードされません。 - mask_image (
np.array) —imageをマスクするための、画像バッチを表すテンソルです。マスク内の白いピクセルは再描画され、黒いピクセルは保持されます。mask_imageが PIL 画像の場合、使用前に単一チャネル(輝度)に変換されます。テンソルの場合は、3 チャネルではなく 1 つの色チャネル(L)を含む必要があります。したがって、期待される形状は(B, H, W, 1)となります。 - negative_prompt (
strまたはlist[str]、省略可) — 画像生成をガイドしないプロンプトです。ガイダンスを使用していない場合は無視されます(guidance_scaleが1未満の場合は無視されます)。 - num_images_per_prompt (
int、任意、デフォルトは 1) — プロンプトごとに生成する画像の数。 - num_inference_steps (
int、任意、デフォルト値は 100) — デノイジングのステップ数です。デノイジングのステップ数を増やすと、推論速度が遅くなる代わりに、通常はより高品質な画像が得られます。 - height (
int、任意、デフォルト値は 512) — 生成される画像のピクセル単位の縦幅です。 - width (
int, 任意、デフォルトは 512) — 生成される画像の幅(ピクセル単位)。 - prior_guidance_scale (
float、任意、デフォルト値は 4.0) — Classifier-Free Diffusion Guidanceで定義されているガイダンススケールです。guidance_scaleは、Imagen Paperの式 2 のwとして定義されています。guidance_scale > 1を設定することで、ガイダンススケールが有効になります。ガイダンススケールを高くすると、promptのテキストと密接に関連する画像の生成が促されますが、通常は画像の品質が低下する傾向があります。 - prior_num_inference_steps (
int、任意、デフォルト値は 100) — デノイジングのステップ数です。デノイジングのステップ数を増やすと、推論速度が遅くなる代わりに、通常はより高品質な画像が得られます。 - guidance_scale (
float、任意、デフォルト値は 4.0) — Classifier-Free Diffusion Guidance で定義されているガイダンススケールです。guidance_scaleは、Imagen Paper の式 2 のwとして定義されています。guidance_scale > 1を設定することでガイダンススケールが有効になります。ガイダンススケールを高くすると、promptのテキストと密接に関連した画像の生成が促されますが、通常は画像の品質が低下する傾向があります。 - generator (
torch.Generatorまたはlist[torch.Generator]、省略可) — 生成を決定論的にするためのtorch ジェネレーター1つまたはリスト。 - latents (
torch.Tensor, 任意) — 画像生成の入力として使用する、ガウス分布からサンプリングされた事前生成されたノイズ付き潜在変数。異なるプロンプトで同じ生成を調整するために使用できます。指定されない場合、指定されたランダムgeneratorを使用してサンプリングを行い、潜在変数テンソルが生成されます。 - output_type (
str, 省略可能、デフォルトは"pil") — 画像生成の出力形式です。"pil"(PIL.Image.Image)、"np"(np.array)、または"pt"(torch.Tensor) から選択します。 - callback (
Callable, 省略可) — 推論中にcallback_stepsステップごとに呼び出される関数です。この関数は、以下の引数とともに呼び出されます:callback(step: int, timestep: int, latents: torch.Tensor)。 - callback_steps (
int、任意、デフォルトは 1) —callback関数が呼び出される頻度です。指定しない場合、callback はすべてのステップで呼び出されます。 - return_dict (
bool、省略可能、デフォルトはTrue) —Trueの場合、通常のタプルではなく ImagePipelineOutput を返します。
戻り値
ImagePipelineOutput または tuple
生成用のパイプラインを呼び出したときに実行される関数。
例:
from diffusers import AutoPipelineForInpainting
from diffusers.utils import load_image
import torch
import numpy as np

pipe = AutoPipelineForInpainting.from_pretrained(
    "kandinsky-community/kandinsky-2-1-inpaint", torch_dtype=torch.float16
)
pipe.enable_model_cpu_offload()

prompt = "A fantasy landscape, Cinematic lighting"
negative_prompt = "low quality, bad quality"

original_image = load_image(
    "https://huggingface.co/datasets/hf-internal-testing/diffusers-images/resolve/main" "/kandinsky/cat.png"
)

mask = np.zeros((768, 768), dtype=np.float32)
# Let's mask out an area above the cat's head
mask[:250, 250:-250] = 1

image = pipe(prompt=prompt, image=original_image, mask_image=mask, num_inference_steps=25).images[0]
enable_sequential_cpu_offload
< source >( gpu_id: int | None = Nonedevice: typing.Union[torch.device, str] = None )
Offloads all models to CPU using accelerate, significantly reducing memory usage. When called, unet,
text_encoder, vae and safety checker have their state dicts saved to CPU and then are moved to a torch.device('meta') and loaded to GPU only when their specific submodule has itsforwardmethod called. Note that offloading happens on a submodule basis. Memory savings are higher than withenable_model_cpu_offload`, but performance is lower.